Restore your web hosting files – a step-by-step guide to restoring files and databases, no prior experience needed.
We walk you through the process from start to finish.
This guide is split into three parts, so if you want to restore everything, work through the whole guide. If you only need to restore files, just follow that section. If you only need to restore a database, skip straight to that part.
Please note that this guide applies to most of our customers. If you use our Windows web hosting, different backup procedures apply and you will need to contact us for backup restoration.
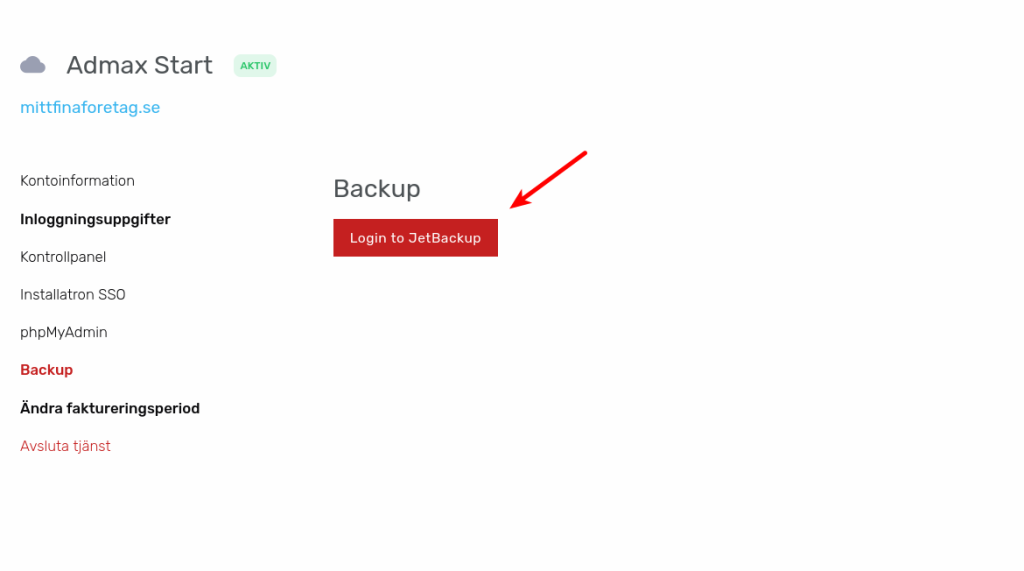
1. Start by clicking the backup button, which you'll find under Services and your web hosting account.

2. Click the "Login to JetBackup" button. You'll be taken automatically to a new tab in your browser.
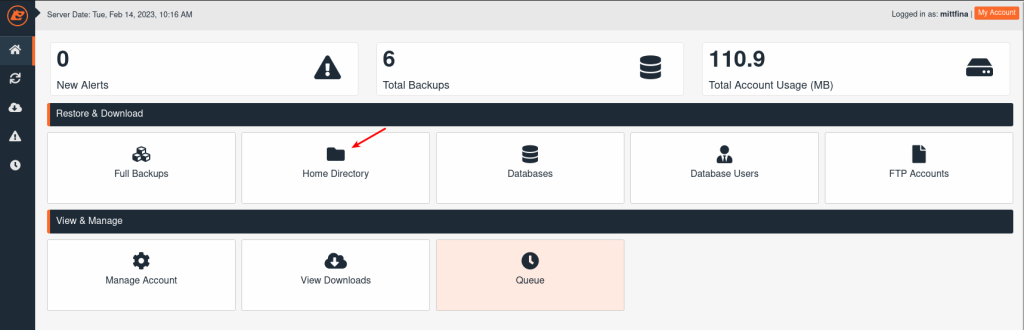
3. Here you'll find a number of features, explained below.
– 1. This shows that you're logged in as "mittfina" (your own username will appear here).
– 2. This shows how many backups you have available – in our example account there are 6.
– 3. Home Directory – these are all your files.
– 4. Databases – these are all your databases.

4. Click "Home Directory" to start restoring all your files.
5. You'll see a list of all available dates to restore from. In this example, we're restoring a backup from 13 February 2023. Click the row that corresponds to the point in time you want to restore.

6. There are two options here: you can either restore the entire account (arrow 1), or restore individual files (arrow 2). We won't cover restoring individual files in this guide, as that's a more advanced task. We'll continue by clicking the Restore button (arrow 1).

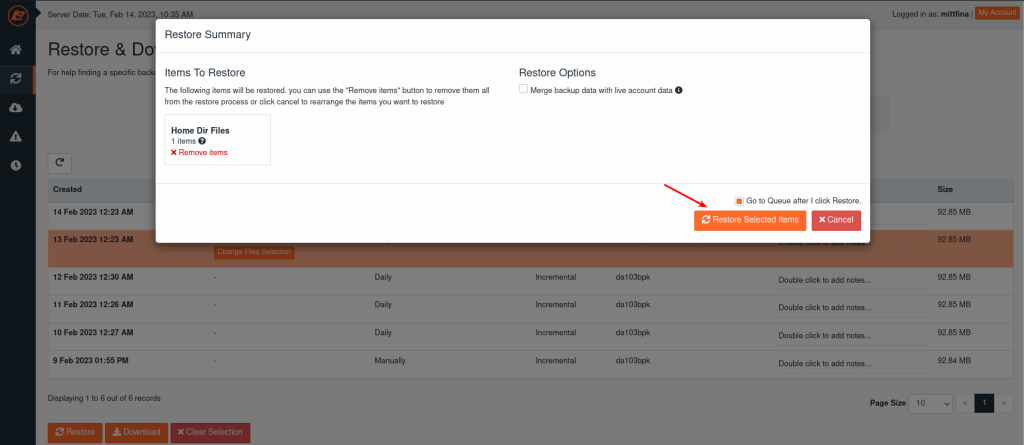
7. Here we see a summary confirming that we're about to restore our Home Directory Files, which contains our website data. Click "Restore Selected Items".
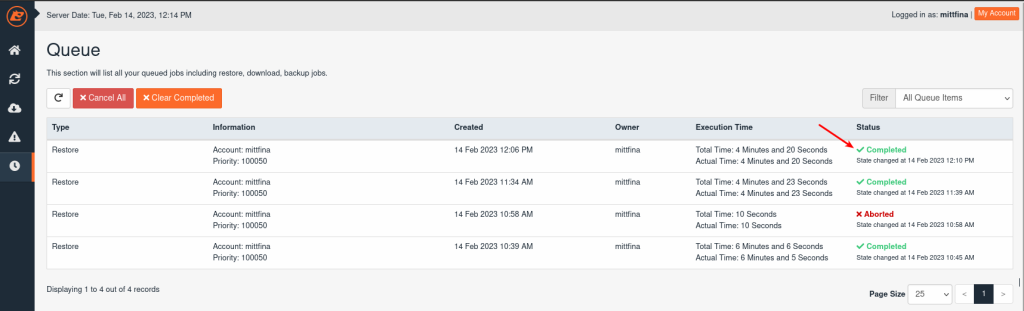
8. You'll now see that we're contacting the Admax cloud backup to restore the files. Note that this may take a while depending on how much data you're restoring. Make yourself a cup of tea or coffee and do something else for a bit while the restore completes.
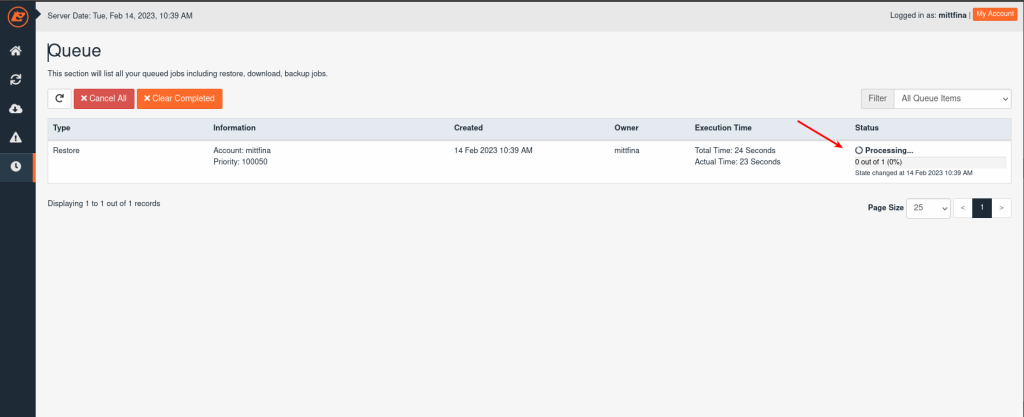
9. The restore is now complete. We can see that it took 6 minutes and that the status is now "Completed".
We've now done a full restore of all files. Next, it's time to restore the database – continue with the guide below (or, if you don't need to restore the database, feel free to finish your tea or coffee and get back to work on your site).

How to restore a database for your web hosting account
This section walks you through a full restore of a MySQL/MariaDB database.
1. Start by clicking the "house icon" to go back to the main menu where we started.

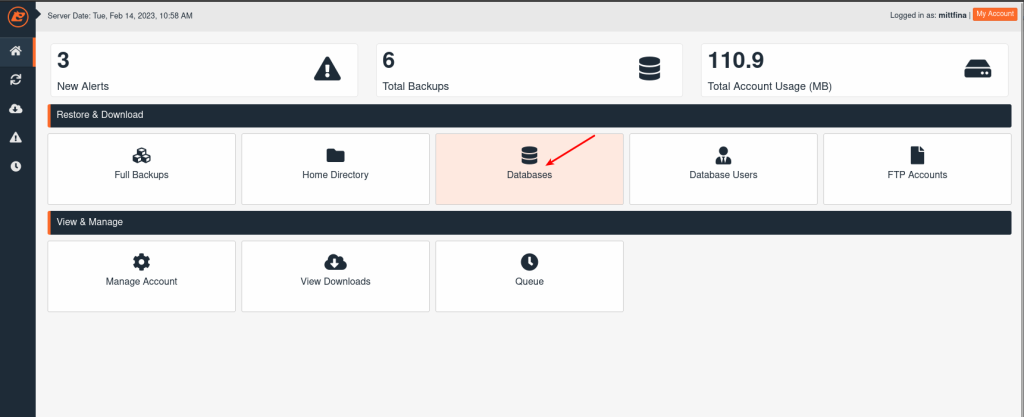
2. Click "Databases".
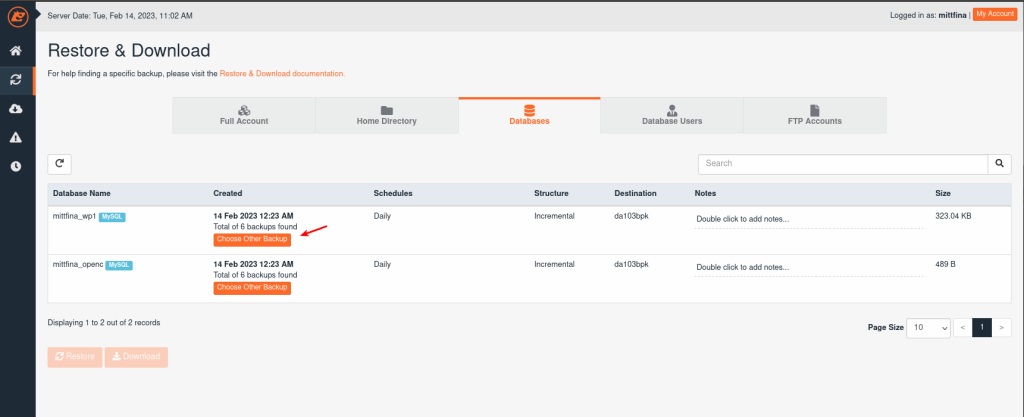
3. Here we want to restore the database mittfina_wp1. Since we don't want to restore from today's date, click "Choose Other Backup".
4. Select the date you want to restore from. In our case, we're choosing 12 Feb 2023 (note that you can restore your database from a different point in time than your files if you wish).
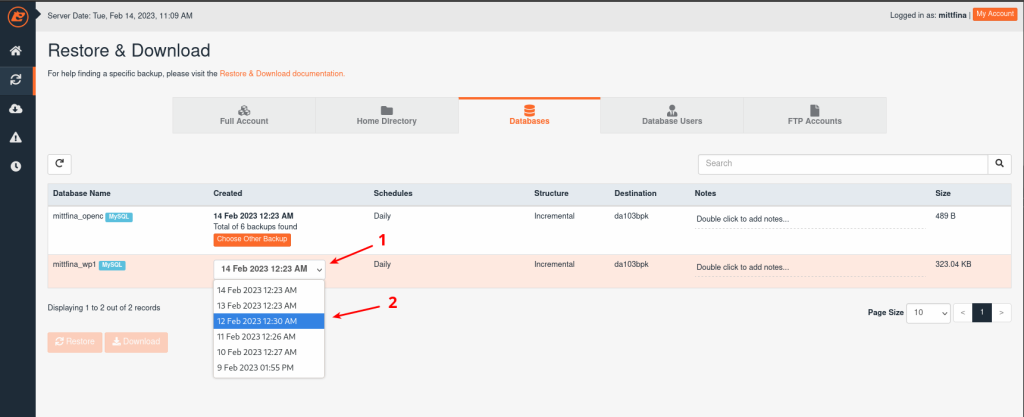
5. Now select the backup from 12 Feb 2023 by clicking on it. If you want to restore multiple databases at the same time, tick them as shown in the image.

6. As shown, we've selected the database mittfina_wp1. Click restore.

7. The screen now shows that one database is about to be restored. Click "Restore Selected Items".
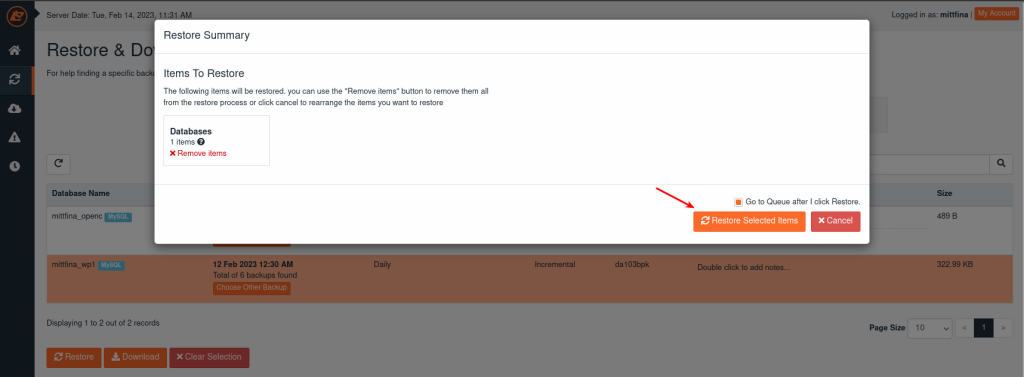
8. The backup is now being fetched from Admax cloud backup. This may take a moment depending on the size of the database, so feel free to take a short break.

9. The database has now been restored. Note: if you haven't accidentally deleted your entire database and your database users still exist, you can stop here – there's no need to restore them. If you do need to restore database users, continue with the next step below. Start by clicking back to the house icon.

How to restore a database user for your web hosting account
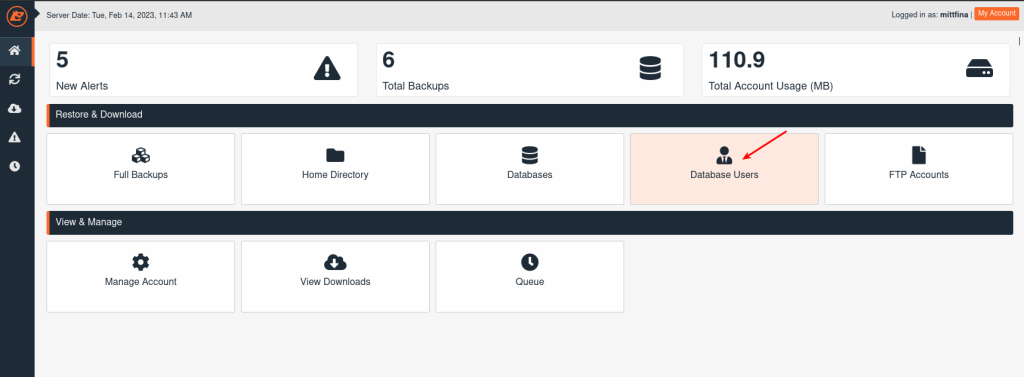
10. Click "Database Users".
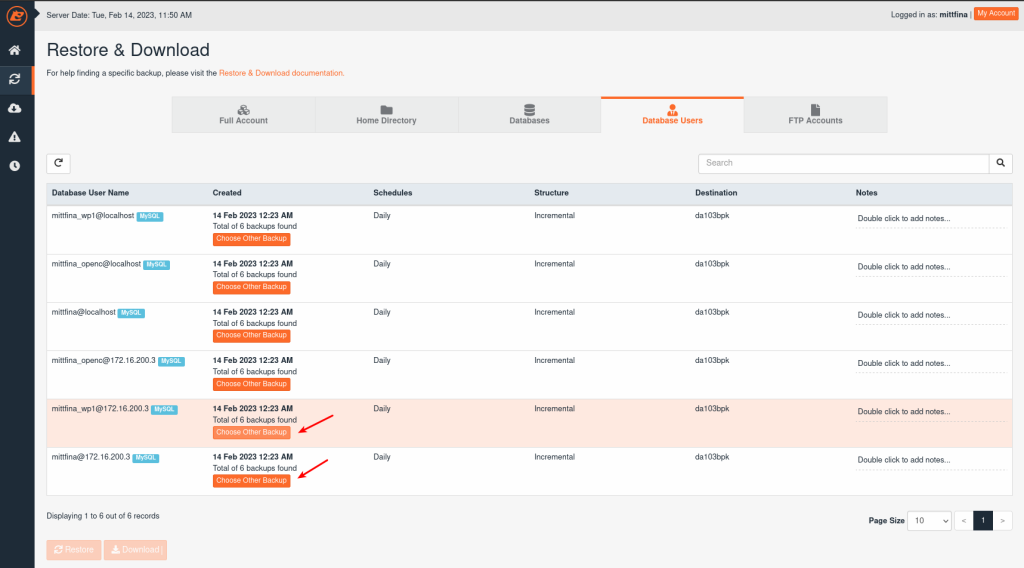
11. Click "Choose Other Backup" and select the database users with an xx@172.16.200.* address (this may vary depending on which server you're on). Make sure you're selecting the correct user you want to restore. As before, you'll need to choose a date – if no date is selected, today's backup will be used automatically. We won't repeat the date selection steps here as they've already been covered earlier in this guide.
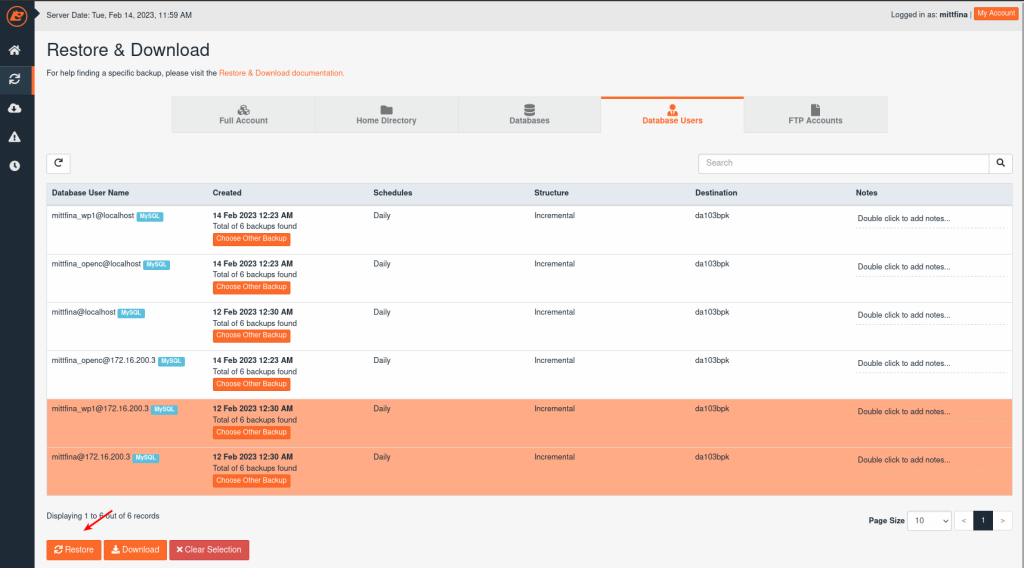
12. Select both users as shown and click "Restore".
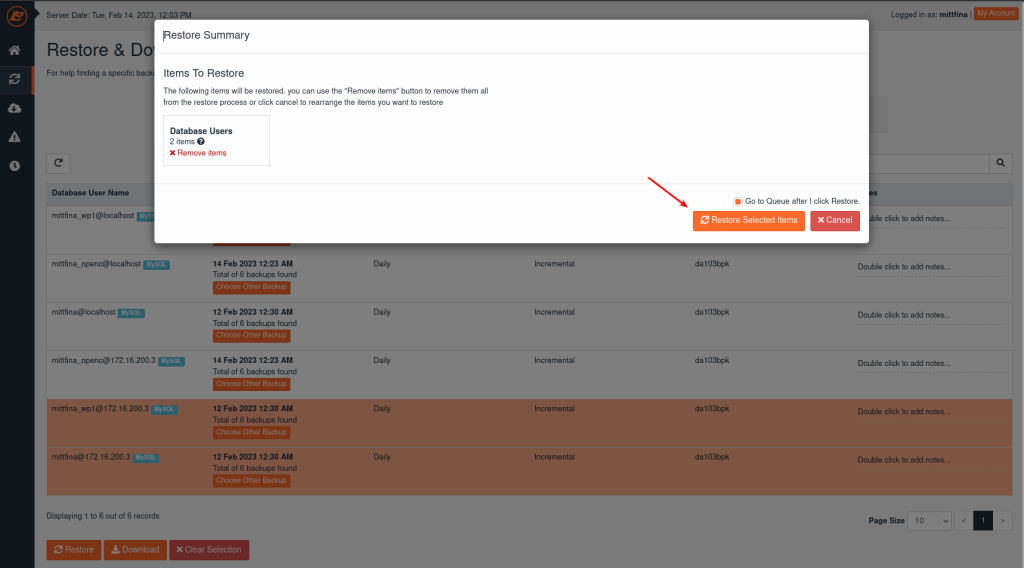
13. Here we can see that two users are about to be restored. Click "Restore Selected Items".
14. The users have now been restored. Your files, database and database users have all been fully recovered – even after a total disaster.